 |
The Cranmer Earth Design Greenhouse |
Over the last few months we have been designing and building a passive solar greenhouse that will not only extend the season for vegetable plants in the garden, but also require little, if any, backup heat.
We are documenting every step and revision from the initial design to make future models more efficient to build than this prototype. Designing started last fall and building started in December, 2011.
Bookmark this page and check back regularly for updates if you are interested in the development of this project! |
 |
 |
Designing The Greenhouse |
| 11/10/11 |
| Over 30 relevent scientific research papers were reviewed to come up with an appropriate design for a passive solar greenhouse for a latitude of 43°. One of the biggest challenges was finding the specific heat capacities and r-values of certain materials. |
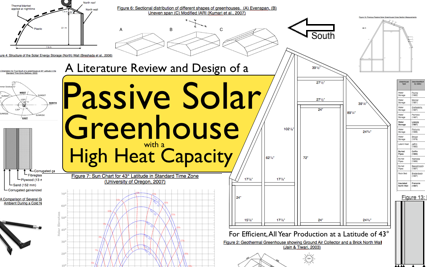 |
| When materials were chosen for the final design, quality was picked over cost to ensure the end product will be as efficient as possible at conserving heat. The result was a 30 page paper that acts as a template for the construction of the prototype greenhouse. |
|
 |
Building The Frame |
| 11/12/21 |
|
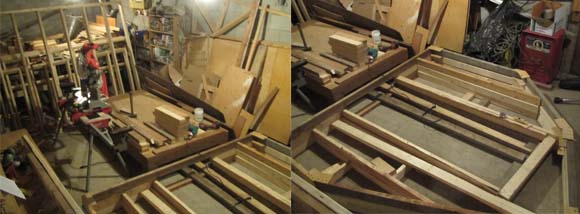
The frame was cut and assembled indoors in several pieces. Screws were used to allow sections to easily come apart in order to move the frames out through a smaller door. |
 |
|
|
 |
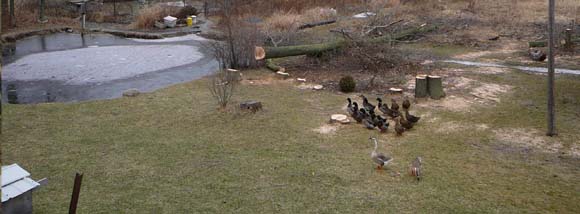
Selecting A Location & Site Preparation |
| 12/01/03 |
|
Ash trees killed by the emerald ash borer were removed and this was found to be a favourable location for the greenhouse, as we have to make sure there are no or few sources of shade. Even if trees are nearby, there is a risk of wind-blown debris damaging the greenhouse. We found this particular spot close to the house, pond and vegetable garden to be optimal. |
 |
|
|
 |
Digging The Footings |
| 12/02/15 |
|
There are several methods that you can use to anchor your building to the ground. Bert Cranmer's original greenhouse had railroad ties placed around the perimeter and flush with the ground. Back 30 years ago, the environmental impacts weren't fully understood and railroad ties were often used in vegetable production settings. Now, even treated wood is being scrutinized. |
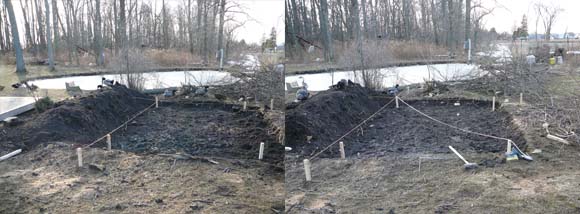 With a concrete box as the goal, the area was dug to the dimensions needed. The soil was placed on the left as there is a small drainage ditch found on the right (North) side. With a concrete box as the goal, the area was dug to the dimensions needed. The soil was placed on the left as there is a small drainage ditch found on the right (North) side. |
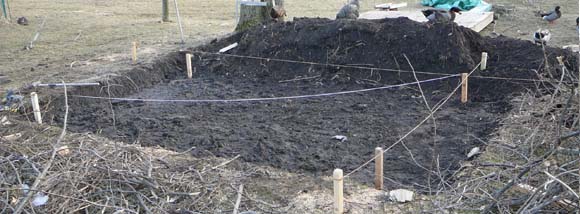 Rope and stakes were used to diagonally measure, level and stake the area to prepare for the formed footings. Rope and stakes were used to diagonally measure, level and stake the area to prepare for the formed footings. |
|
 |
Preparation For Concrete Pouring |
| 12/03/02 |
|
The outer edge of the 8' x 12' area is seen framed below. |
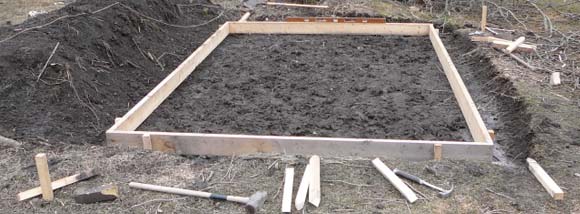 The accuracy of the level was tested by checking the level against standing water. The accuracy of the level was tested by checking the level against standing water. |
 The inner framing was added level to the outer frame. The frame was constructed to ensure easy disassembly after the concrete is poured. Therefore, the inner boards are nailed only to the stakes. Sand will be used to fill any gaps between the forms and the earth. The inner framing was added level to the outer frame. The frame was constructed to ensure easy disassembly after the concrete is poured. Therefore, the inner boards are nailed only to the stakes. Sand will be used to fill any gaps between the forms and the earth. |
|
 |
Pouring The Footings |
| 12/03/14 |
|
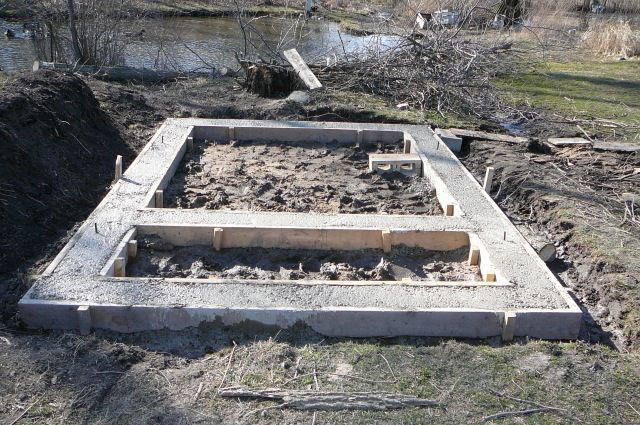
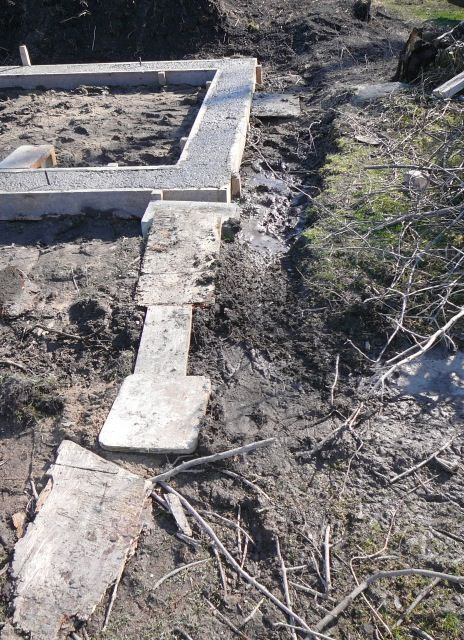
A cement mixer was used to make the concrete which consisted of seven parts pit run gravel, (3/4" crushed with screenings) one part portland cement along with some additional plasticizer and water. About one and a half bags of portland cement was used altogether and seven 5-gallon pails of water. The plasticizer was used so the cement would set slower, as it took around two and a half hours to mix and pour the concrete. While the cement was emptied from the mixer into the wheel barrow, the new batch was added to the mixer and allowed to mix while the concrete in the wheelbarrow was poured. The forms were screened with a 2 x 4 after every pour. A small bridge was added to make it easier for the wheelbarrow to access the centre. |
 |
 |
Above: The footings a couple hours after they were poured.
Right: A drainage channel was dug to remove water from the hole before the concrete was poured. |
|
| The amount of water added to the mix made the concrete thick and not sloppy to give it the best strength possible. Upon completion, a half dozen fist size rocks were placed in the concrete mixer with water and allowed to spin for 10 minutes. The water was then poured into the wheel barrow to flush off any remaining concrete. This was done to keep everything clean and ready for the next project. |
|
 |
Removing Forms & Adding Polystyrene |
| 12/03/20 |
|
The concrete was allowed to set for a few days before the forms were removed. The weather this week happened to be ideal as it was over 10°C day and night. |
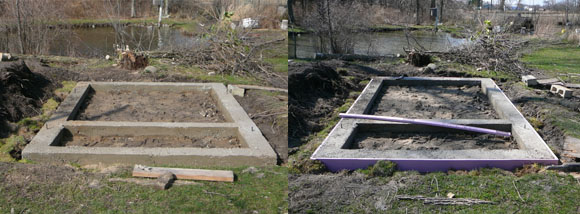 5 1/2" x 1" exterior type polystyrene was placed all around the footings. 5 1/2" x 1" exterior type polystyrene was placed all around the footings. |
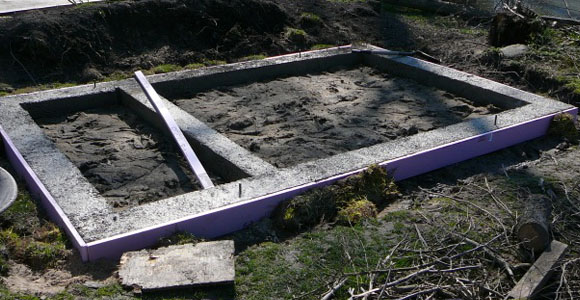 This will help keep the frost from damaging the concrete as well as act as a thermal break between the greenhouse and the ground. This will help keep the frost from damaging the concrete as well as act as a thermal break between the greenhouse and the ground. |
|
 |
Filling Interior with Drainage Material |
| 12/03/23 |
|
The centre has been filled with sand to facilate drainage. Sand was used because we already had it around, but gravel could've been used as an alternative. |
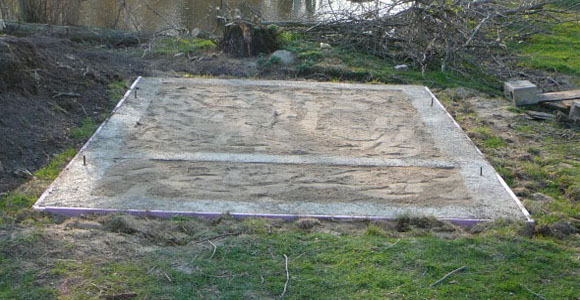 Sand was also used around the perimeter to allow for optimal water drainage. We are now ready to apply the sill plate gasket and start erecting. Sand was also used around the perimeter to allow for optimal water drainage. We are now ready to apply the sill plate gasket and start erecting. |
|